
This guide covers connecting FuseSign to your organisation's SharePoint. Once connected, FuseSign users can pick documents straight from SharePoint when they build a signing bundle instead of downloading and re-uploading them, and the completed signed document is saved back to SharePoint automatically.
Important Notes Before Connecting Sharepoint
-
Connecting the integration requires a Microsoft Entra administrator to authorise on behalf of your organisation, as well as a FuseSign Champion to connect from FuseSign’s end.
-
When connecting the integration, Sharepoint will automatically connect to the default root site. If this root site is not where your organisation stores client files and documents, please reach out to support@fuse.work.
-
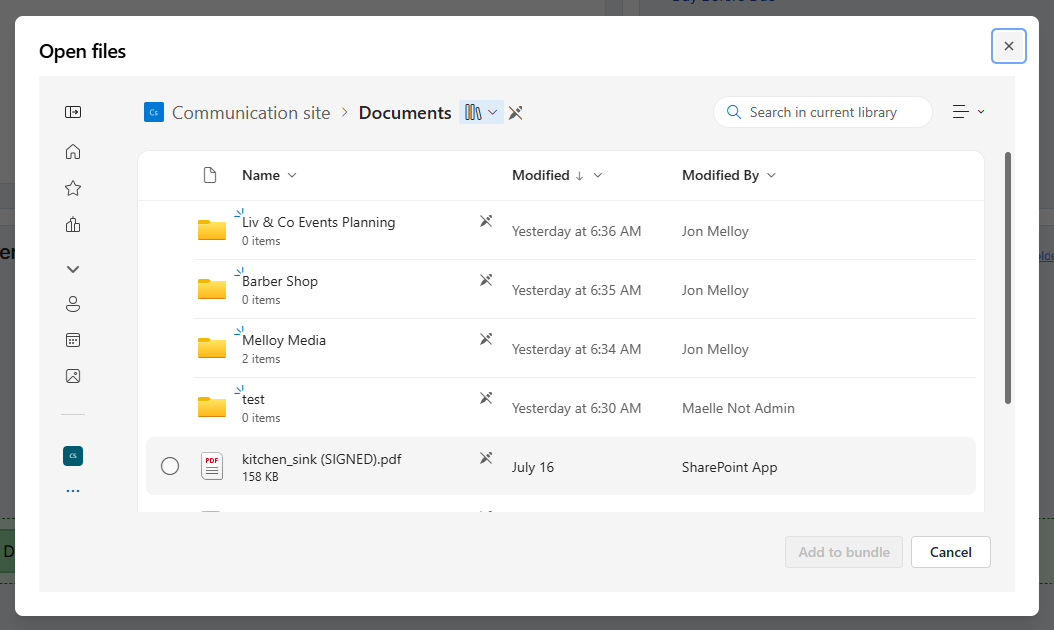
If your organisation has multiple Sharepoint sites, these may be accessed via Quick Access when uploading documents to FuseSign, depending on your organisations configuration. Please reach out to our support team for further details if required
Connecting the Sharepoint Integration
Connecting always requires a Microsoft Entra administrator to consent on behalf of your organisation. Which flow you follow depends on who is doing the work:
|
Your situation |
Follow |
|---|---|
|
You are the champion, you are not an Entra administrator, and your Entra settings allow you to request approval from an admin as part of an authorisation flow |
Flow A — you request, an administrator approves, you complete |
|
You are the champion and you do have Entra administrator access — in your own right, temporarily granted, or with an administrator driving your machine |
Flow B — you complete the entire flow |
Not every organisation lets people request approval, and you may not know whether yours does until you try. You find out at step 4 of Flow A, Part 1 — if there is no way to send a request, stop there and switch to Flow B.
Permissions FuseSign requests
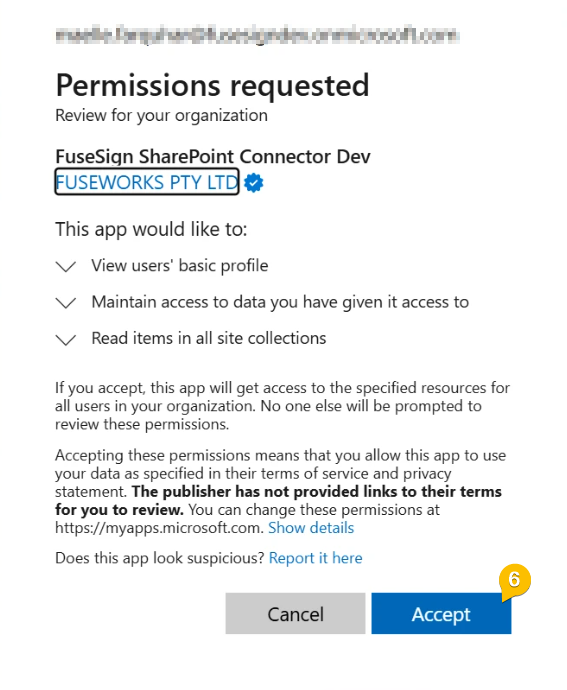
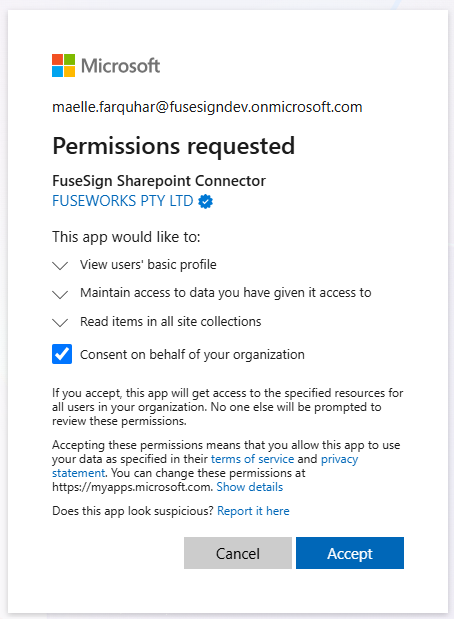
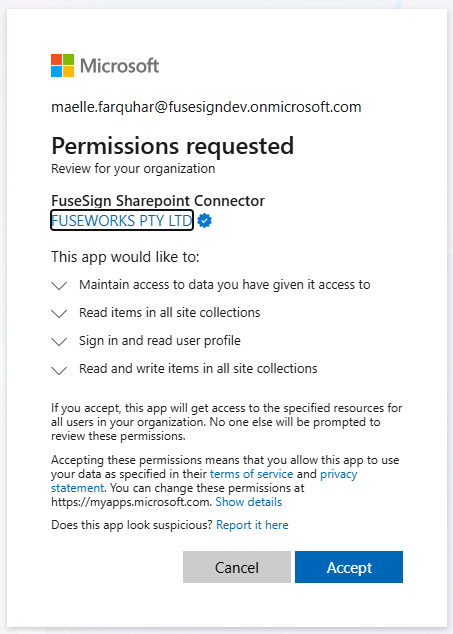
Whoever grants consent will be asked to approve four Microsoft Graph permissions:
|
Permission |
Type |
What Microsoft calls it |
Why FuseSign needs it |
|---|---|---|---|
|
|
Delegated |
Read items in all site collections |
Lets a signed-in FuseSign user browse SharePoint and pick a document when building a signing bundle. Because it is delegated, it acts as that user — they can only see documents they already have access to. |
|
|
Application |
Read and write items in all site collections |
Lets FuseSign write the completed signed PDF back into the same SharePoint folder as the original document once signing finishes. This runs in a background service after the signer has left, with no signed-in user to act as, which is why it has to be an application permission rather than a delegated one. |
|
|
Delegated |
Sign in and read user profile |
Standard sign-in — lets the user authenticate and identifies who connected. |
|
|
Delegated |
Maintain access to data you have given it access to |
Lets FuseSign refresh its access token so users are not forced to sign in again every time they add a document. |
Flow A
Part 1 — Champion: Request Approval
-
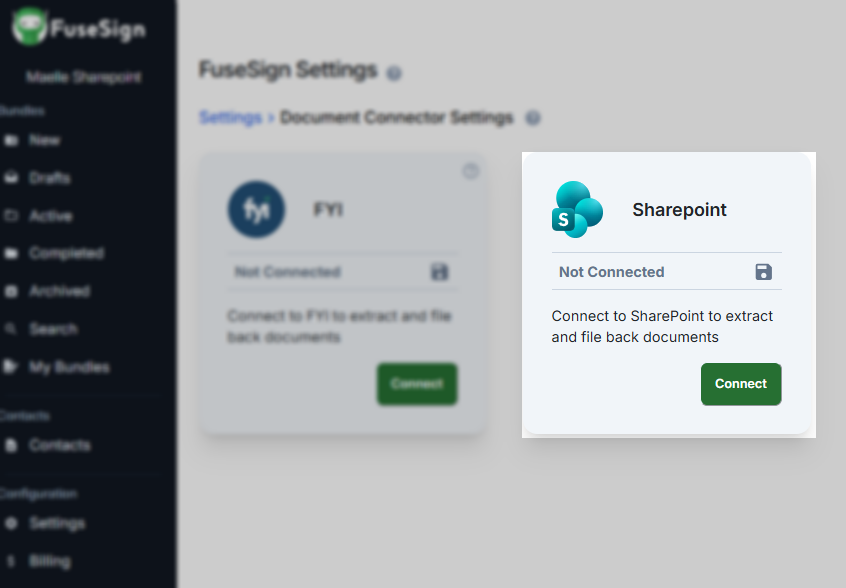
In FuseSign, go to Settings → Document Connector Settings, and click Connect on the Sharepoint card
-
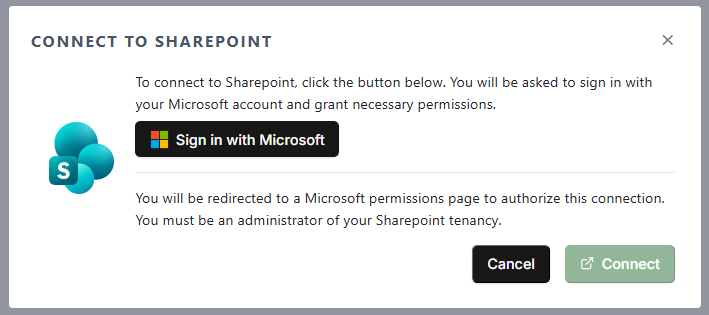
Click Sign in with Microsoft and sign in with your Microsoft account.
-
Microsoft will show you a consent screen telling you that approval is needed and that you cannot approve it yourself. This is expected — it is not an error.
-
Look at what that screen offers you. This is the point where you find out whether Flow A will work for your organisation:
-
If you can enter a reason and there is a Request Approval button, carry on with step 5 below.
-
If there is no way to send a request — just a message telling you that you do not have permission, or that an administrator has to approve it — then your organisation has enabled the Microsoft setting that allows approval requests. Stop here and use Flow B instead.
-
-
Enter a reason for the request, for example: "FuseSign needs access to SharePoint so that we can add documents from SharePoint to signing bundles."
-
Select Request Approval.
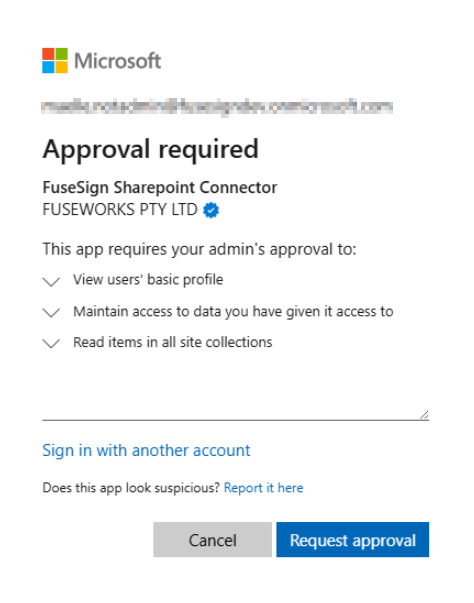
Microsoft records your request for your Entra administrators under Admin consent requests. Administrators are not always notified automatically, so contact your administrator and point them at Part 2 below. You cannot go any further until they have granted consent.
Need help getting your IT provider to approve the integration?
If your Microsoft 365 environment is managed by an external IT provider or internal IT team, you may need their assistance to approve the FuseSign SharePoint Connector in Microsoft Entra.
You can use the email template below to send them the information they need to review and approve the integration.
SUBJECT - Approval required for FuseSign SharePoint integration
Hi [IT Contact],
We’re currently setting up the FuseSign integration with SharePoint and need your help to approve the required Microsoft permissions.
The integration will allow our team to select documents directly from SharePoint when sending them for signature through FuseSign. Once signing is complete, the signed document is automatically saved back to the relevant SharePoint location.
Could you please review and approve the FuseSign SharePoint Connector in Microsoft Entra?
FuseWorks has further technical information and setup instructions here:
https://knowledgebase.fuse.work/FuseSign/sharepoint-integration
You can contact the FuseWorks support team on support@fuse.work
Please let us know if you have any questions.
Thanks,
[Name]
If you are signed in with the wrong Microsoft account, click Switch User on the connector page and sign in again with the correct one before requesting approval.
Part 2 — Entra Administrator: Approve Request and Grant Consent
These steps require a Microsoft Entra administrator— you need the Global Administrator or Privileged Role Administrator role.
-
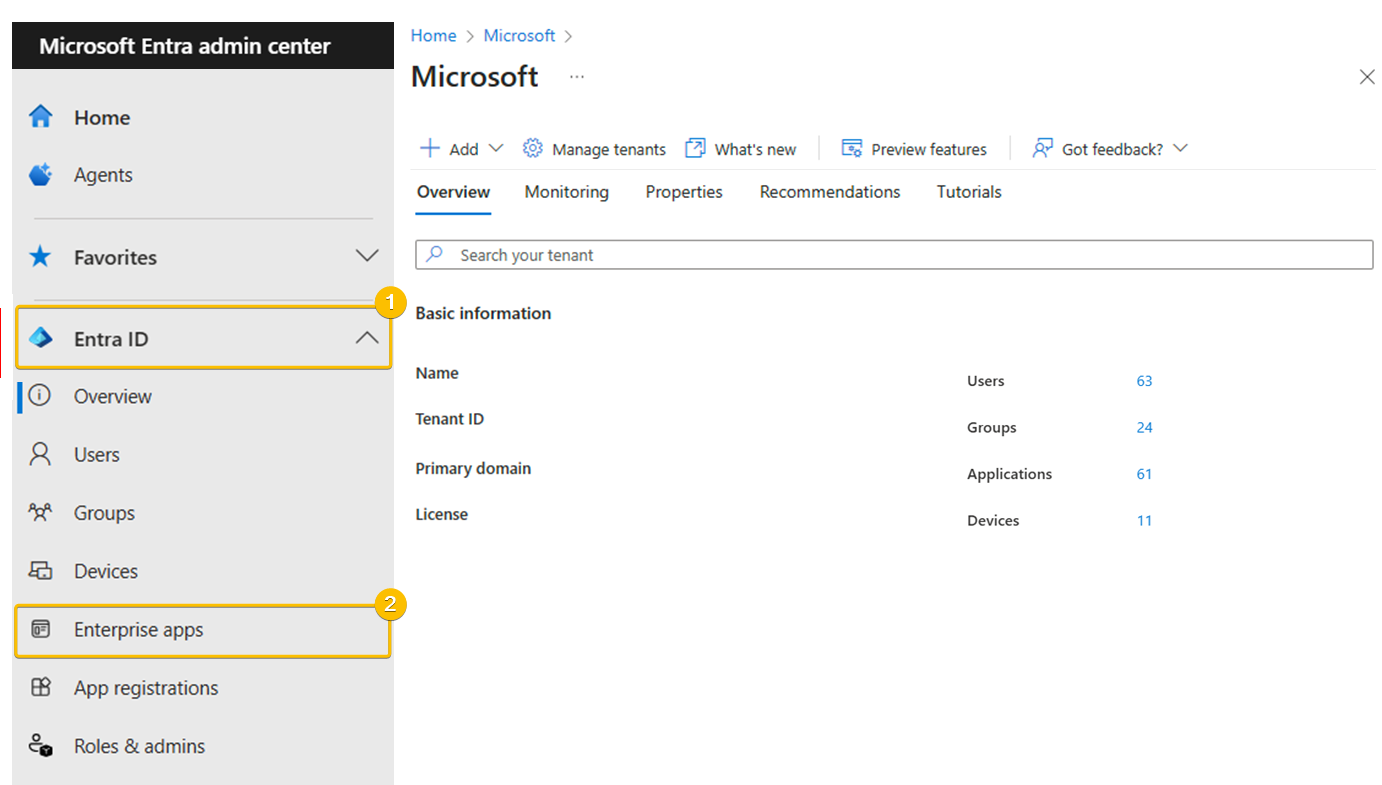
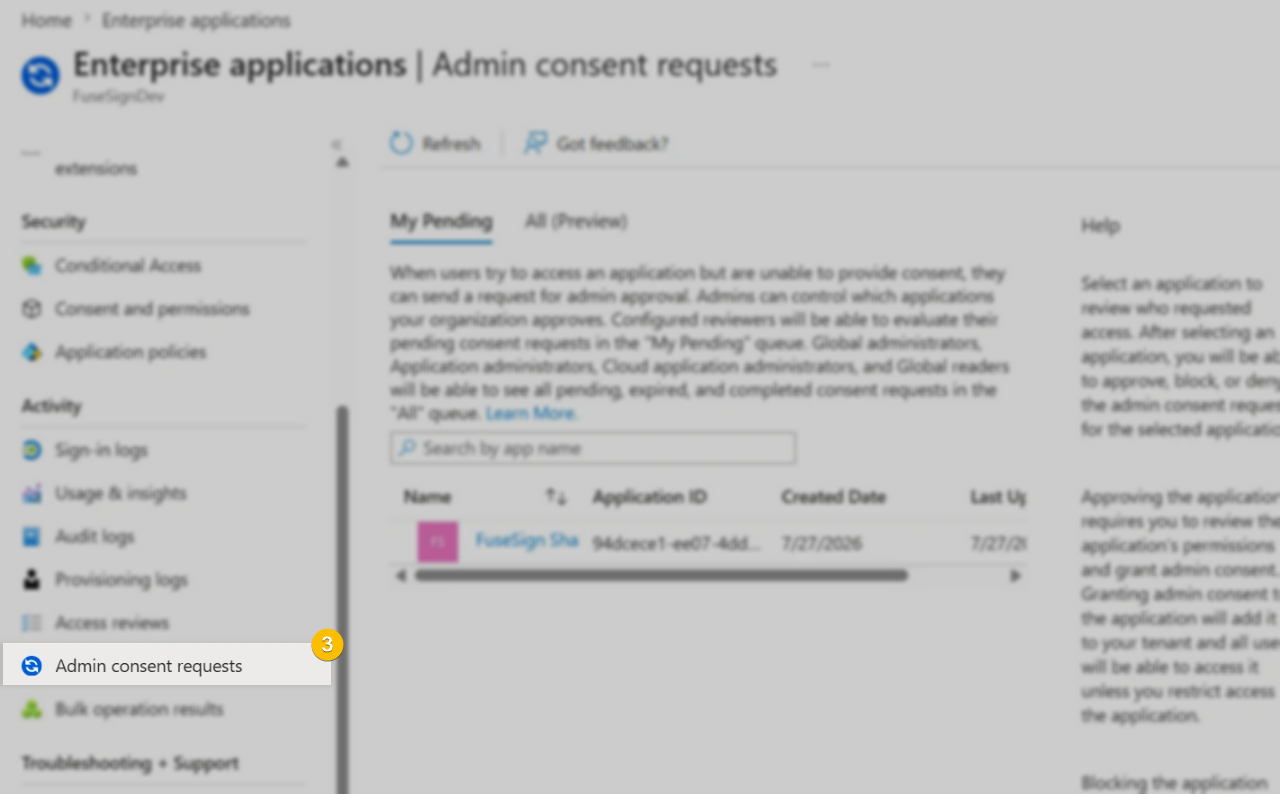
Go to the Microsoft Entra admin center and open Enterprise applications → Admin consent requests.
-
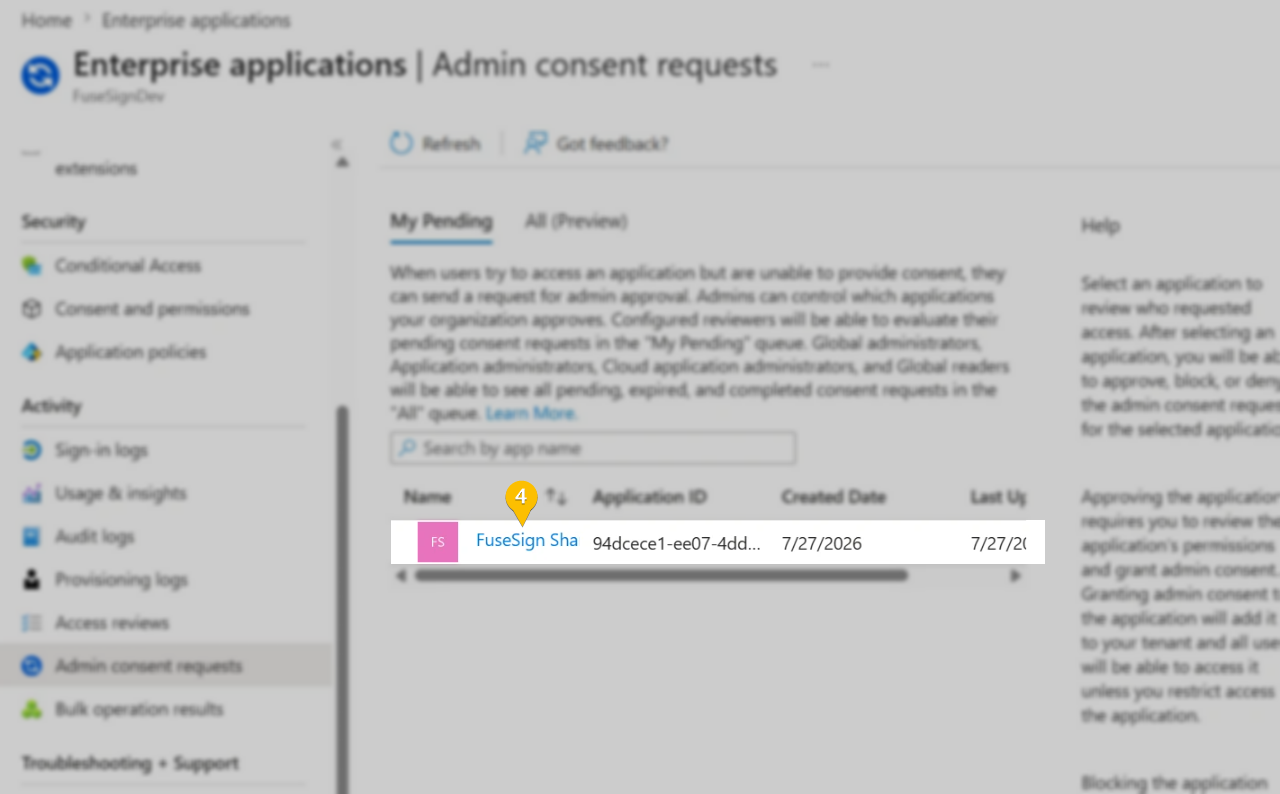
Find FuseSign SharePoint Connector in the list.
-
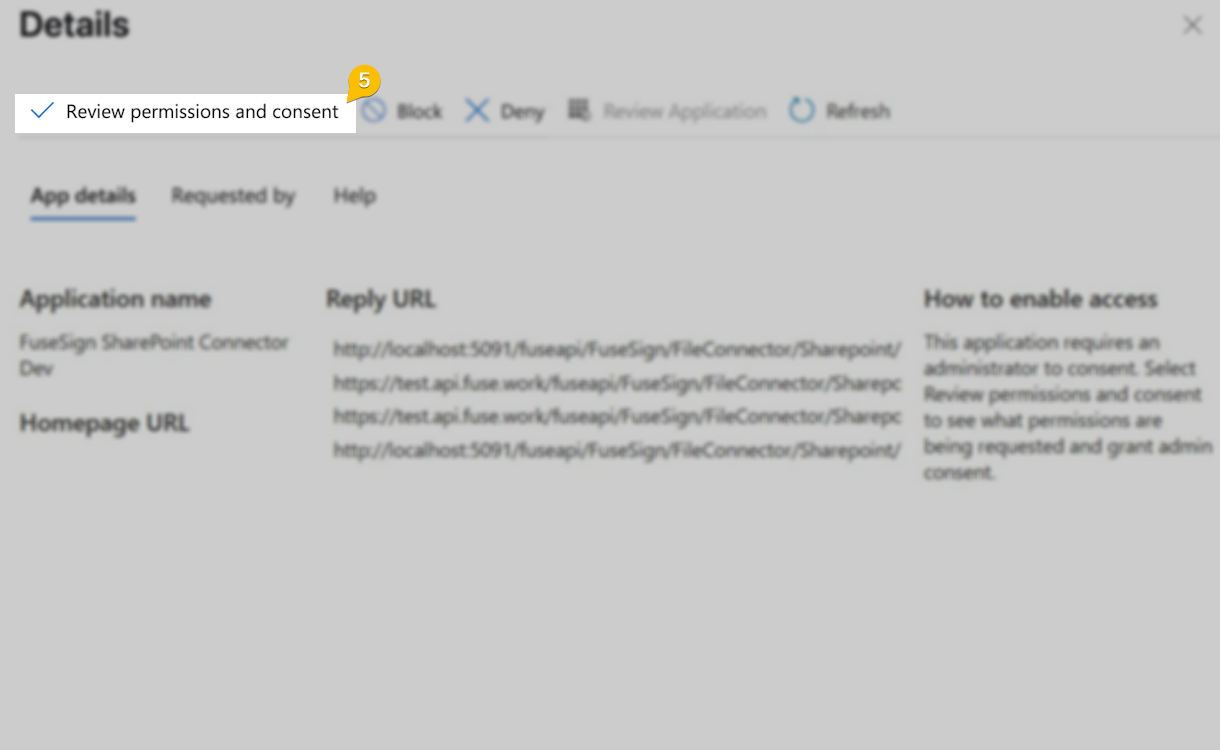
Select Review Permissions and Consent. You will then be asked to sign in and select Accept to authorise requested permissions.
-
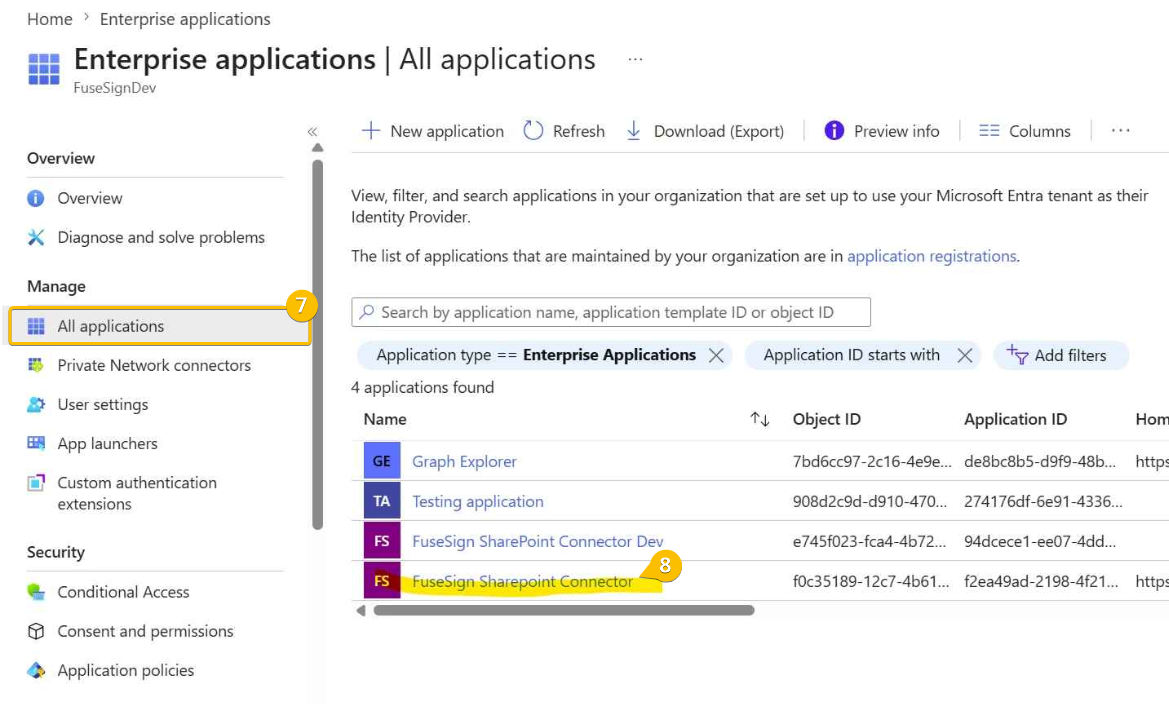
Confirm that FuseSign SharePoint Connector now appears under Enterprise applications → All applications.
-
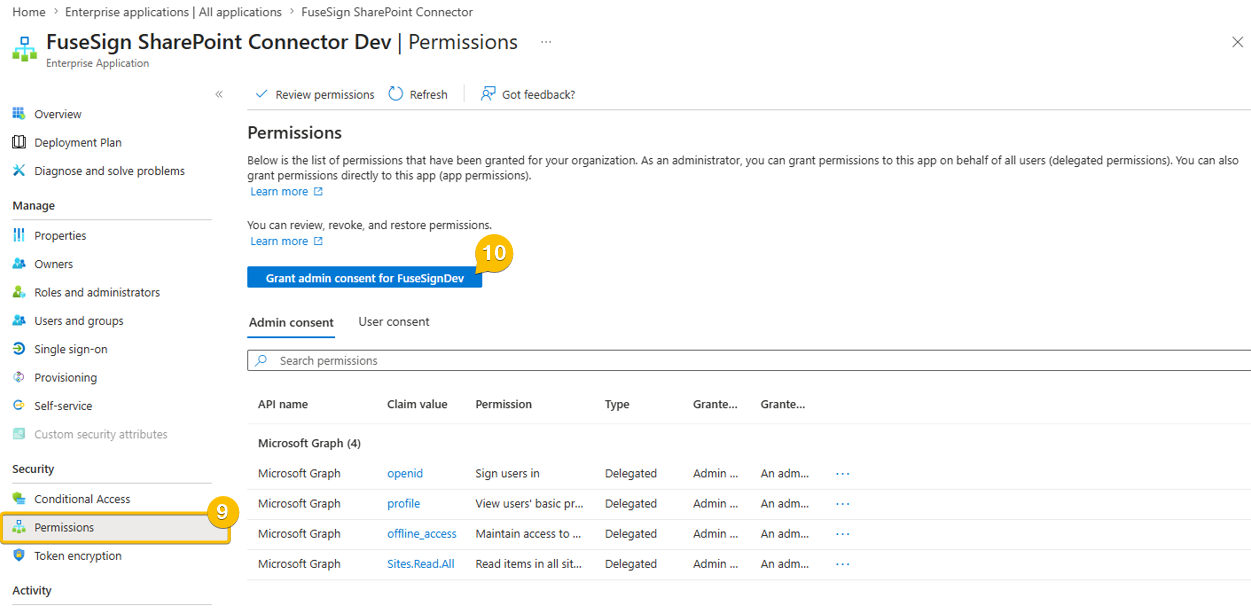
Open the application by selecting it and navigate to Permissions.
-
Click Grant admin consent for <your organisation>.
-
Sign in once more and grant the requested permissions.
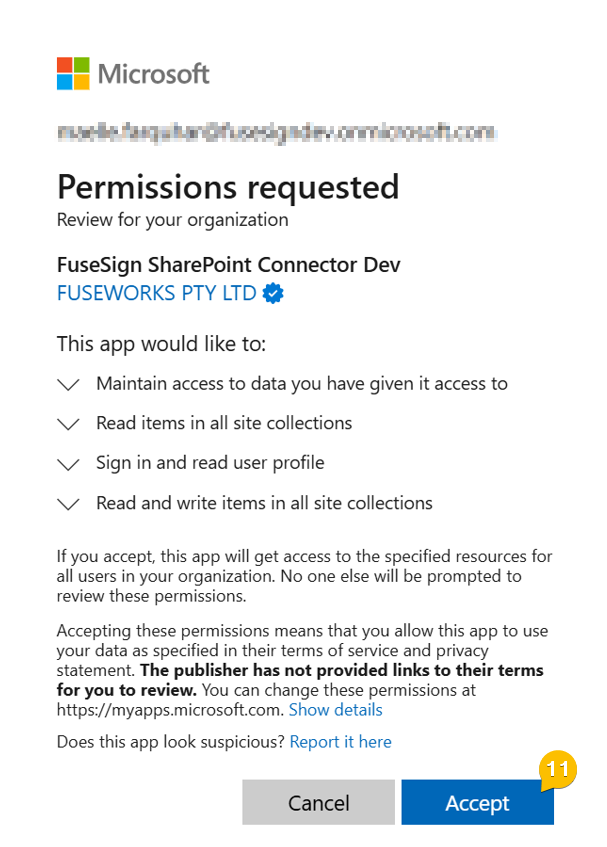
If any consent screen offers Consent on behalf of your organization, tick it. Without it, each user is prompted to consent individually the first time they add a SharePoint document to a bundle.
Granting consent does not finish the connection. Tell the champion you are done so they can complete Part 3.
Part 3 — Champion: Finalise the Connection
-
Return to the Connect to SharePoint page in FuseSign.
-
Click Sign in with Microsoft again. This time sign-in should complete without a consent block.
-
Click Connect.
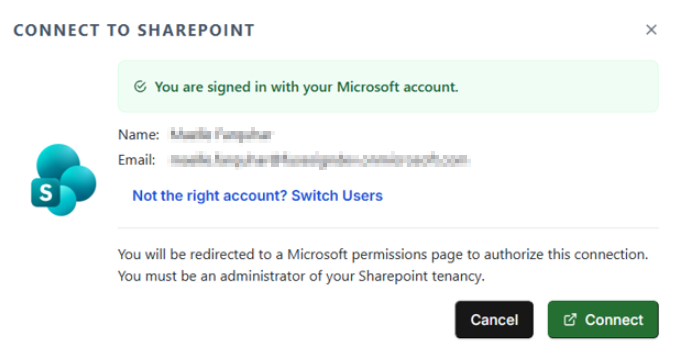
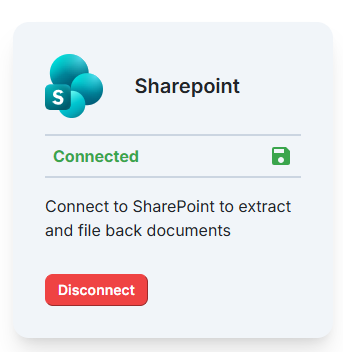
The SharePoint connection is now active.
Flow B
Everything happens inside the FuseSign connector, in one sitting, with no separate approval request. Organisations usually get here in one of four ways:
-
The champion already holds the Global Administrator or Privileged Role Administrator role.
-
A temporary FuseSign Champion account is created for the Entra administrator, so they can complete the connection. Once the Sharepoint connector is set up, the temporary account is archived.
-
An Entra administrator connects remotely to the champion's machine and completes the flow in the champion's browser, then signs out of Entra again afterwards.
-
The champion's account is temporarily granted the Entra administrator role by whoever administers your Microsoft users and licences, and the role is removed once the connection is made.
-
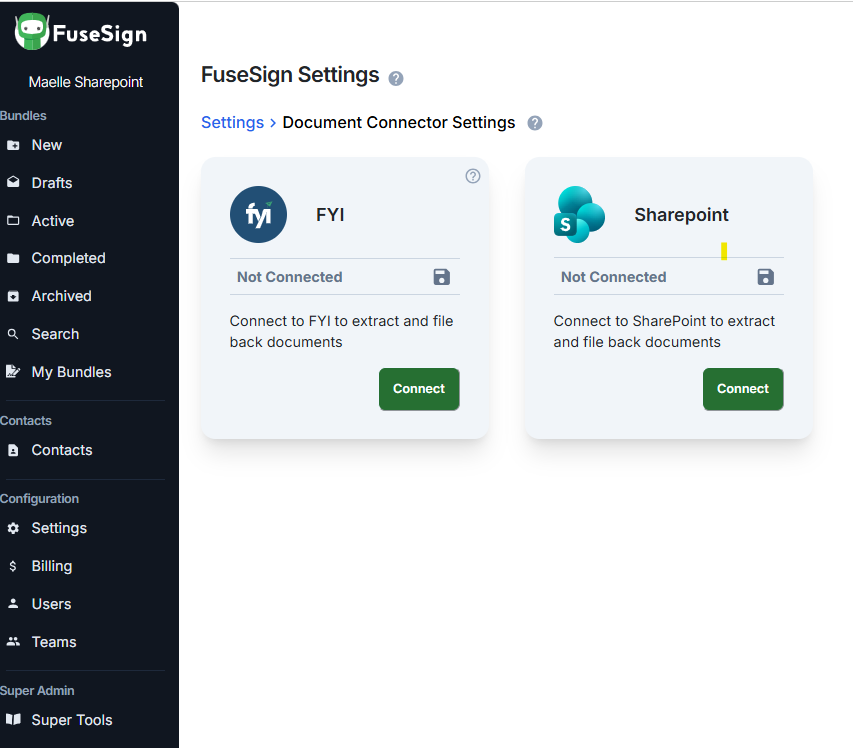
In FuseSign, go to Settings → Document Connector Settings, and click Connect on the Sharepoint card
-
Click Sign in with Microsoft and sign in with the Entra administrator account.
-
Review and accept the requested permissions.
-
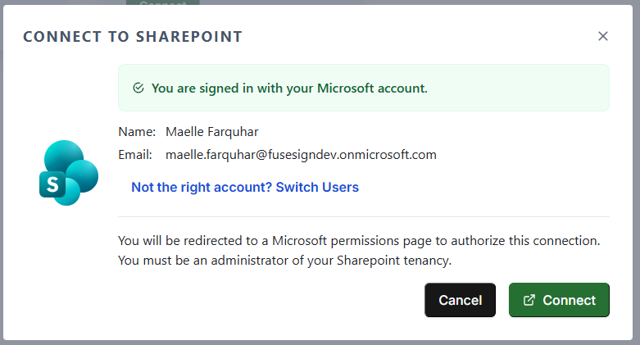
You will be returned to the first screen, but Connect will now be available.
-
Click Connect and sign in with the Entra administrator account again.
-
Review and accept the requested permissions.
-
Tick Consent on behalf of your organization. This is recommended — without it, colleagues are prompted to consent individually the first time they add a SharePoint document to a bundle.
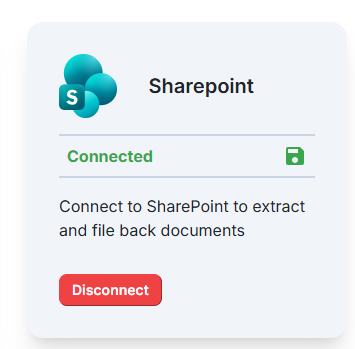
The SharePoint connection is now active.
If an administrator signed in on someone else's machine to do this, remember to sign out of Microsoft and Entra in that browser afterwards.
Using the Integration
Once the connection is active, each FuseSign user who wants to upload documents from Sharepoint does a one-off sign-in before they can pick SharePoint documents:
-
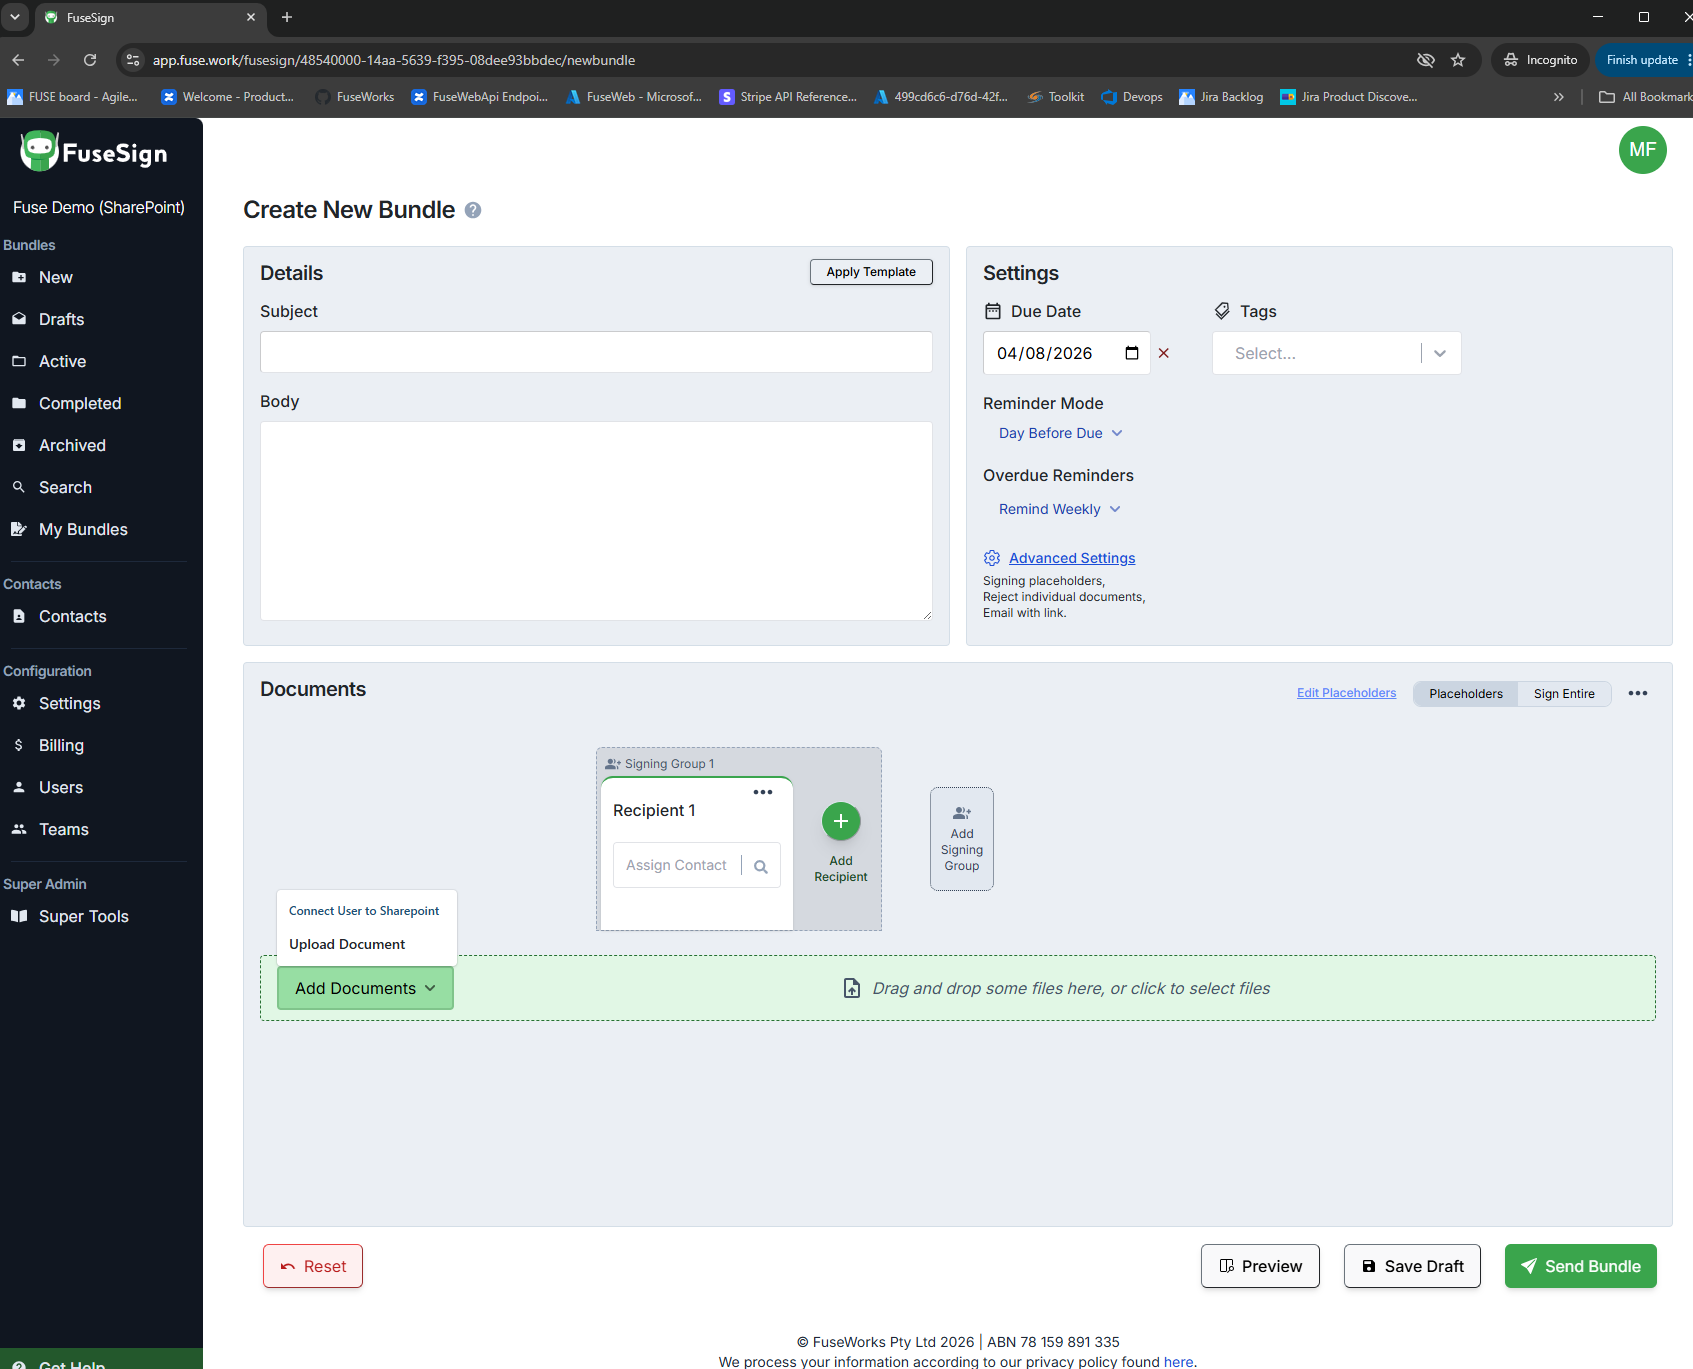
In the bundle creator, click Connect User to SharePoint.
-
Sign in with an account that has access to the SharePoint your organisation has connected FuseSign to.
-
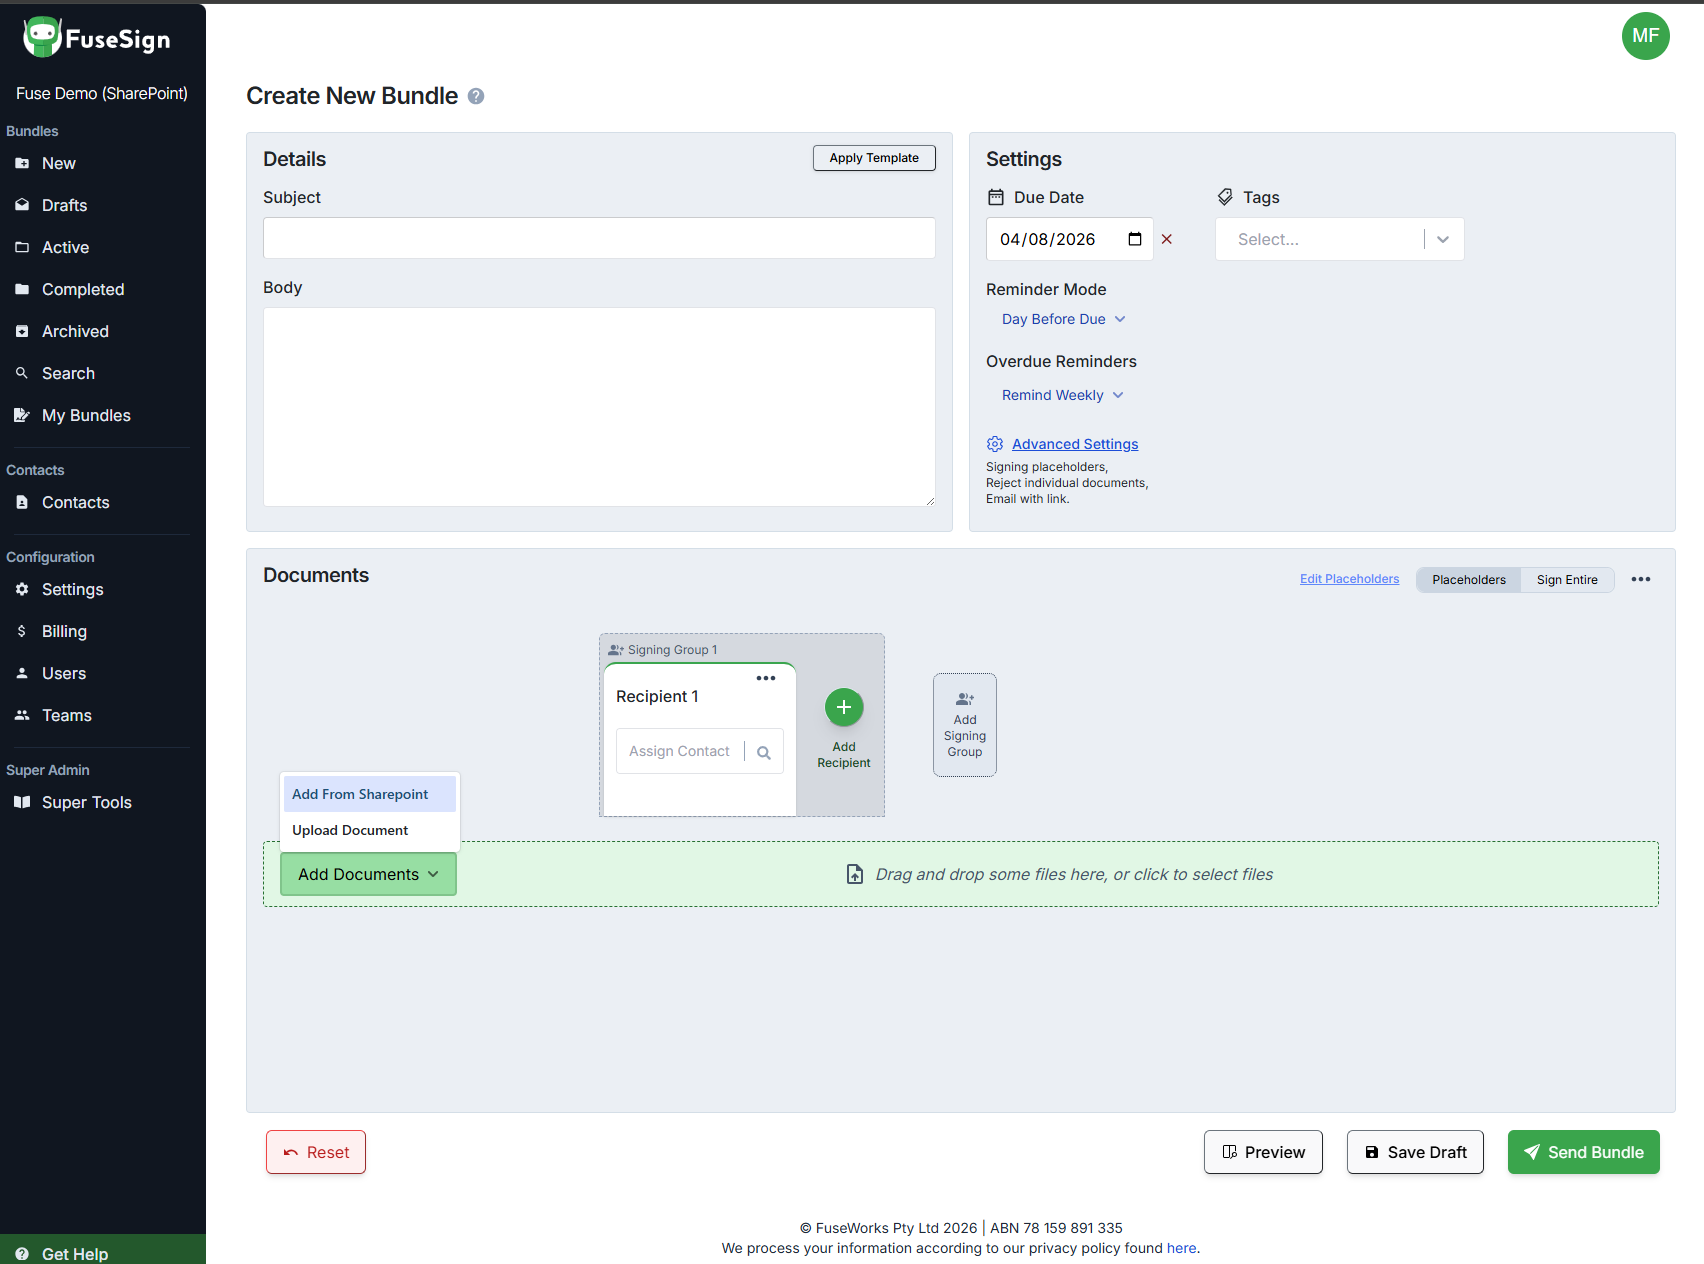
Click Add From SharePoint and choose a document.
Troubleshooting
Signed in with the wrong Microsoft account? In the connector settings, click Switch User and sign in again with the correct account. In the bundle creator there is no equivalent button — clearing the cookies for the page achieves the same thing.
Frequently Asked Questions
Q: Can I use SharePoint with other document integrations?
Only one Document Connector can be connected to FuseSign at a time. We recommend connecting SharePoint only if it is your primary document management system.
If your secondary document systems supports external integration (such as FYIDoc’s ‘Send for Signature’/Method A), this can be used in conjunction with the Sharepoint Document Connector.
Q: Can I search by folder?
The SharePoint file picker does not offer a specific search by folder functionality. However, search results include files that are in folders that match the keyword you are searching for. If you want to navigate to a specific folder from the search results, click on its location link.