Adding Bundle Recipients
A 'bundle recipient’ is a person who will be receiving the bundle to either view or sign a document.
When adding recipients, keep in mind that you might need to prove that the documents were viewed or signed by the intended person. This means that it’s important to have an email and mobile number that you can associate directly to that person (rather than their bookkeeper, personal assistant, or general administration inbox for example).
Learn more about recipients that share email or mobile numbers below.
Related: Learn more about the options for multi-factor Recipient Verification.
Bundle Recipients
You can add Bundle Recipients from the Documents Panel. By default, each new bundle will have one recipient in one signing group.
Adding Recipients
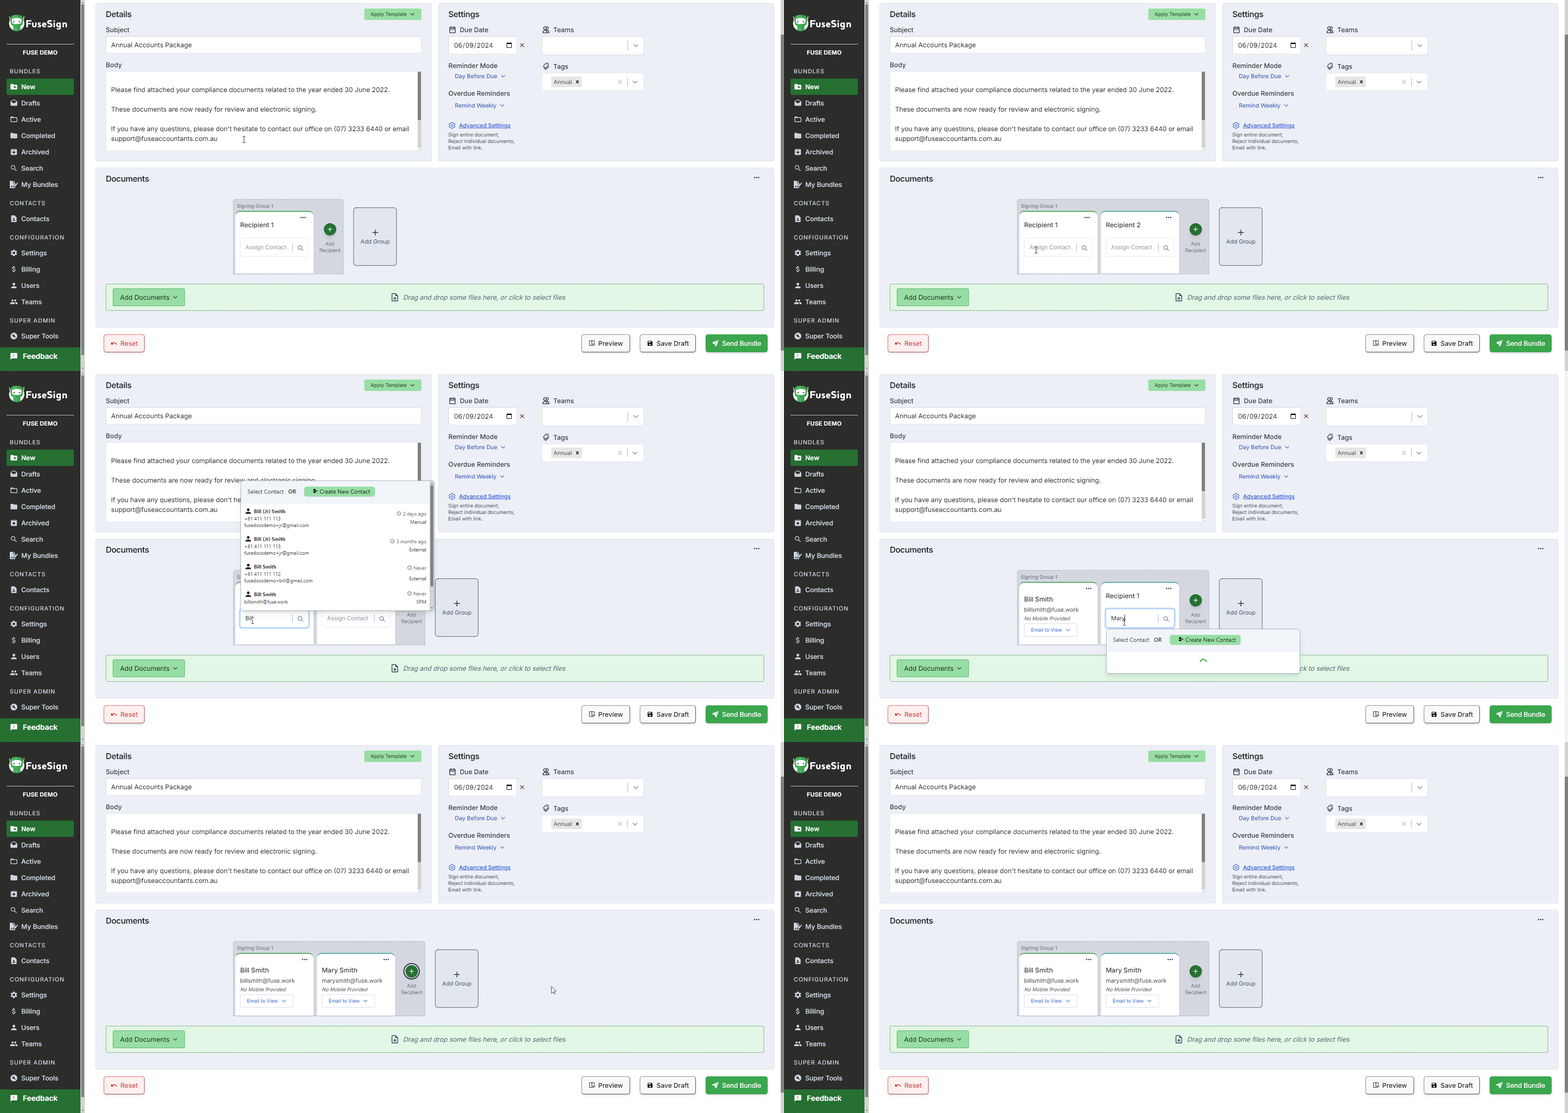
To add a recipient to the bundle, click on the + Add Recipient button.
Assigning Contacts
To assign an existing FuseSign Contact to a recipient card, start typing directing into the corresponding Assign Contact search bar, then select the recipient from the list. You can also select the ![]() button to create a new manual contact on the fly.
button to create a new manual contact on the fly.
As you search for the contact details you can see the contact record source and the last time the contact was used. Current Contact Data Sync contacts will be prioritised in this search.
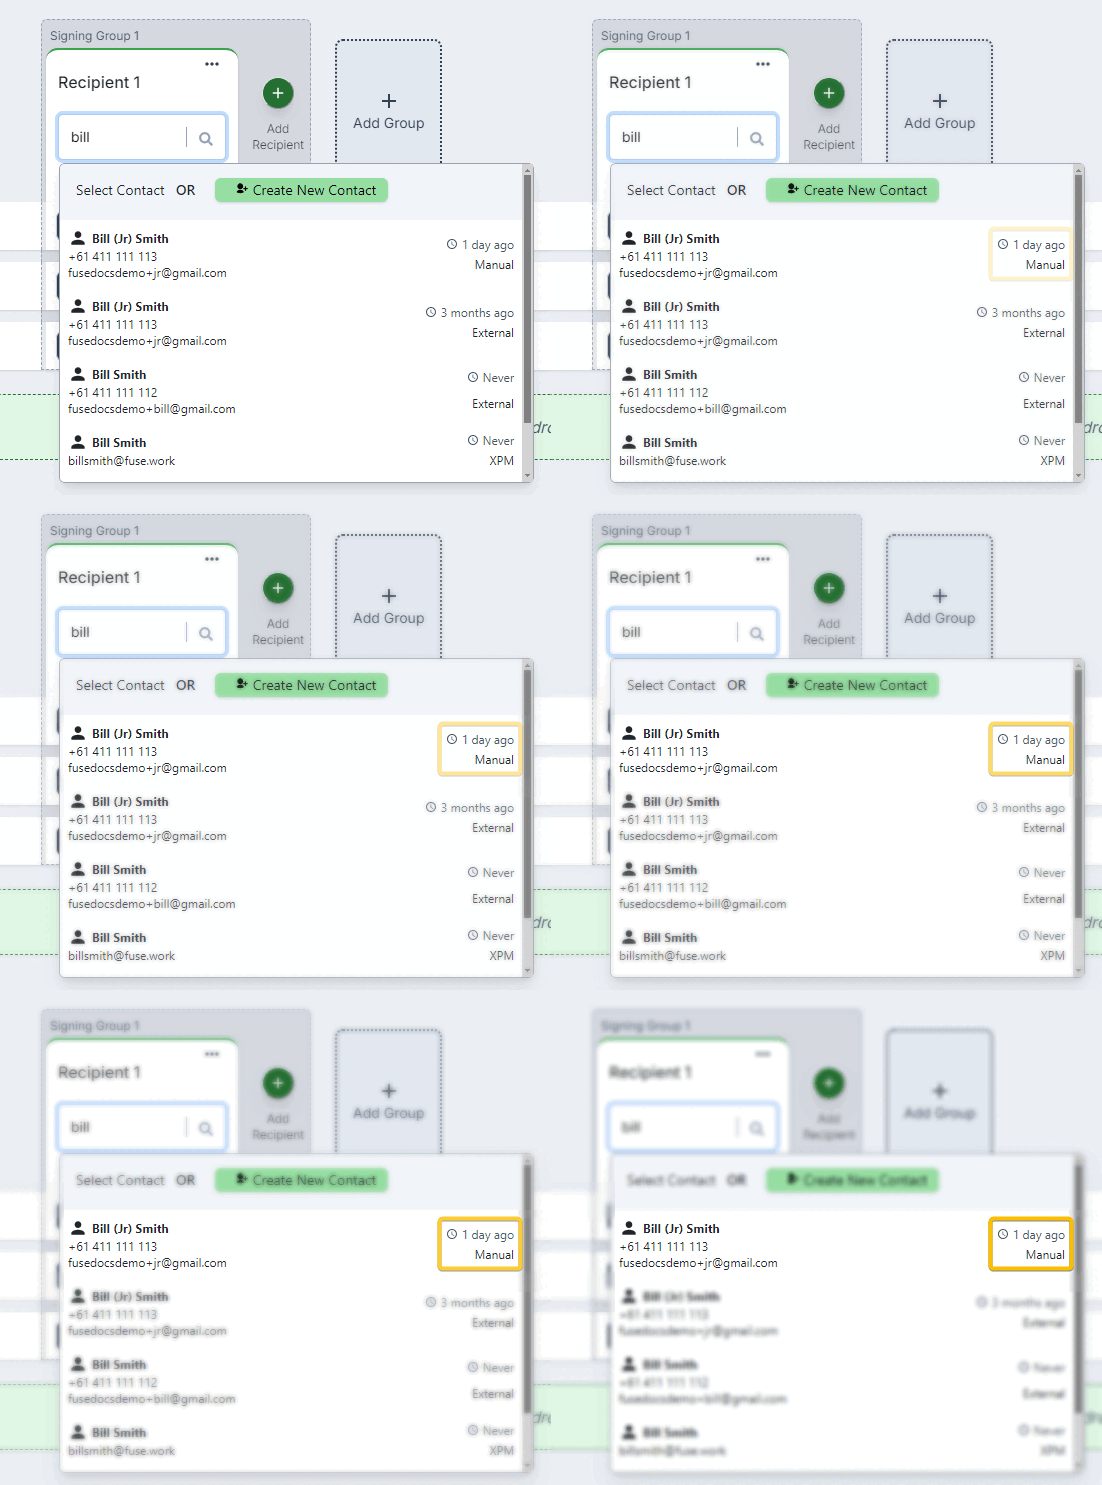
Read more about syncing FuseSign Contacts to your practice management system via Contact Data Sync, managing duplicate contacts, and editing contact records in Contact Management.
You can now set bundle actions and add signature placeholders to a Recipient without a Contact being assigned to it. This can be helpful if you want to set up a bundle, but are still waiting on contact information for a client.
Assigning Verification
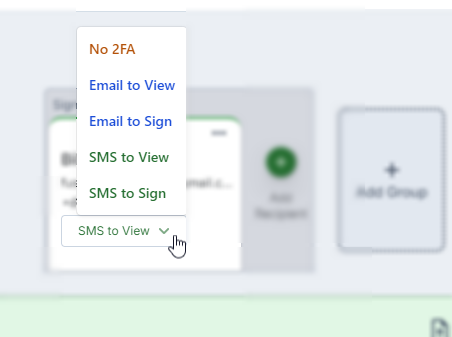
Once a contact is assigned you can use the drop down menu under their name to select the type of Verification Method from the available options. The default verification method set and the available options will be determined by your Business Settings.
Removing Recipients
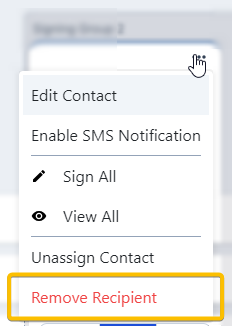
To remove a recipient from a bundle, select the  menu on the recipient card and select Remove Recipient. If you have a contact assigned to that recipient, you will also have the option to select Unassign Contact, which will remove the contact details but retain existing signing actions, placeholders, etc.
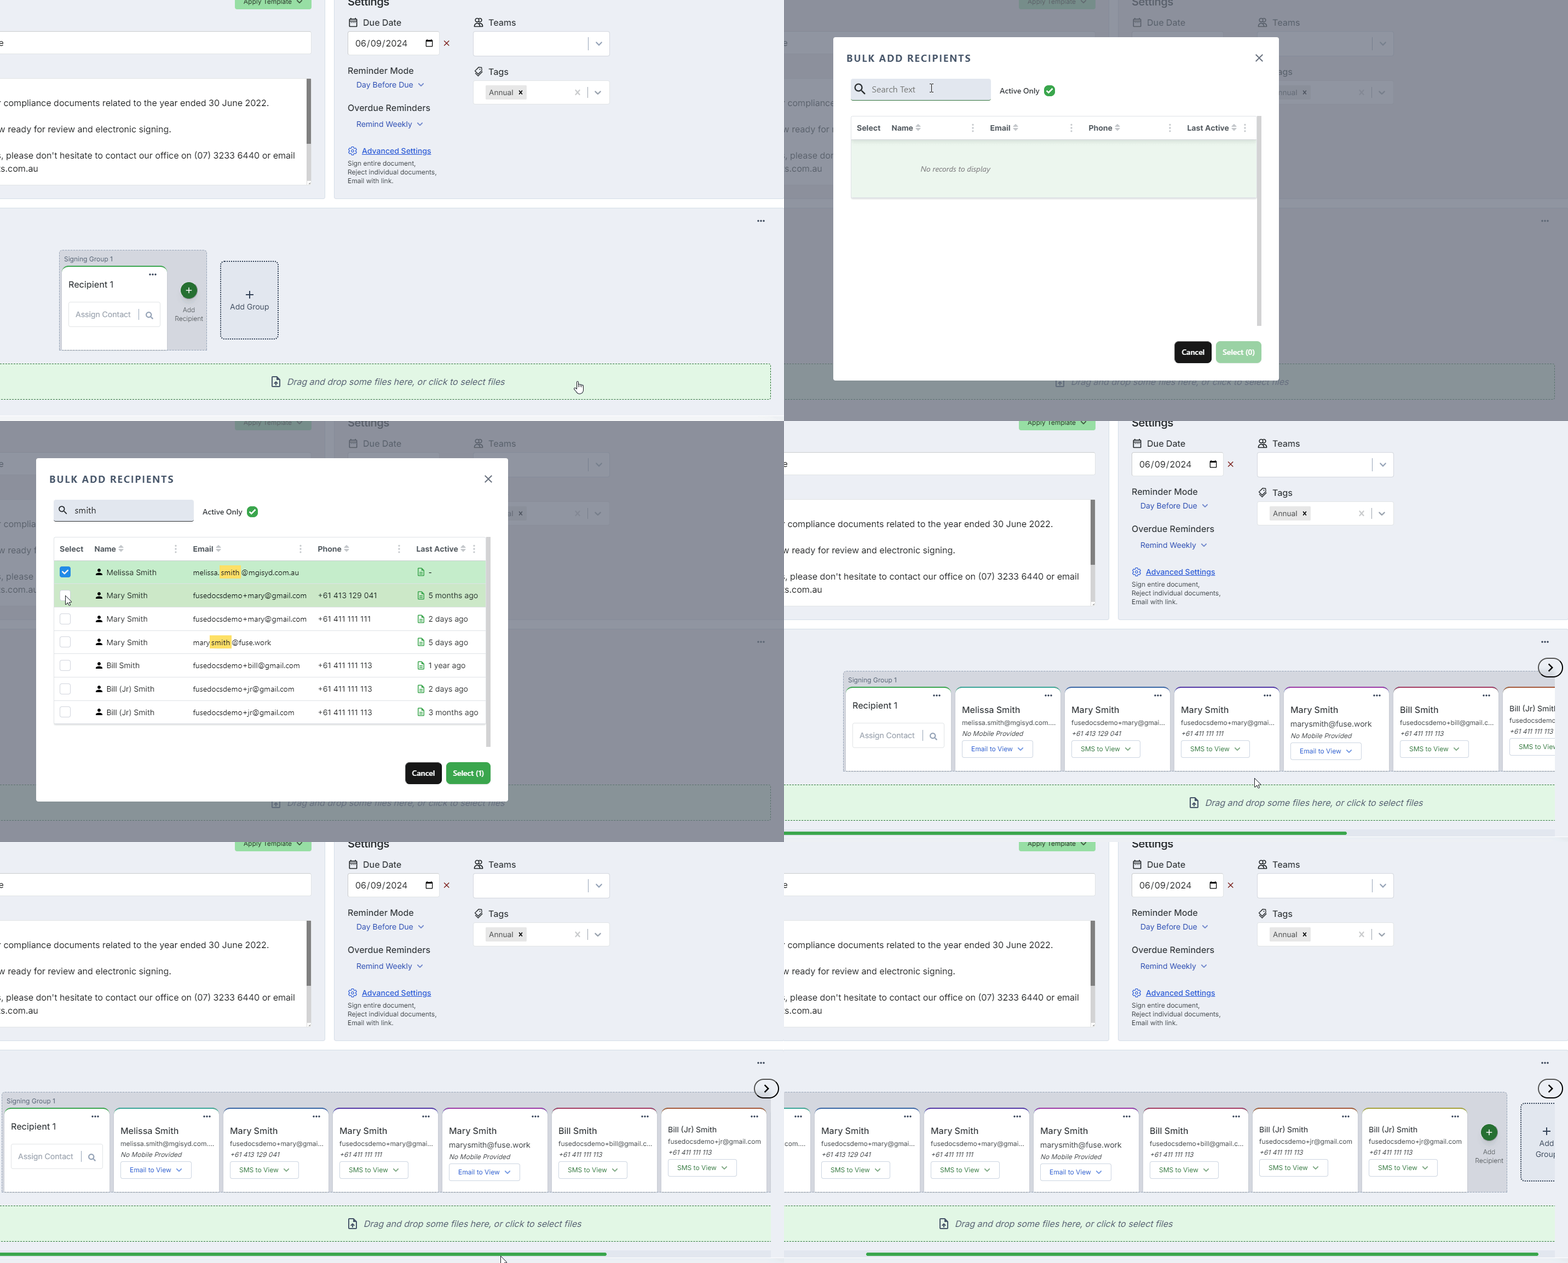
Bulk Add Recipients
You can use the  menu in the top right corner of the Documents panel to bulk add recipient to the bundle.
Recipient Settings
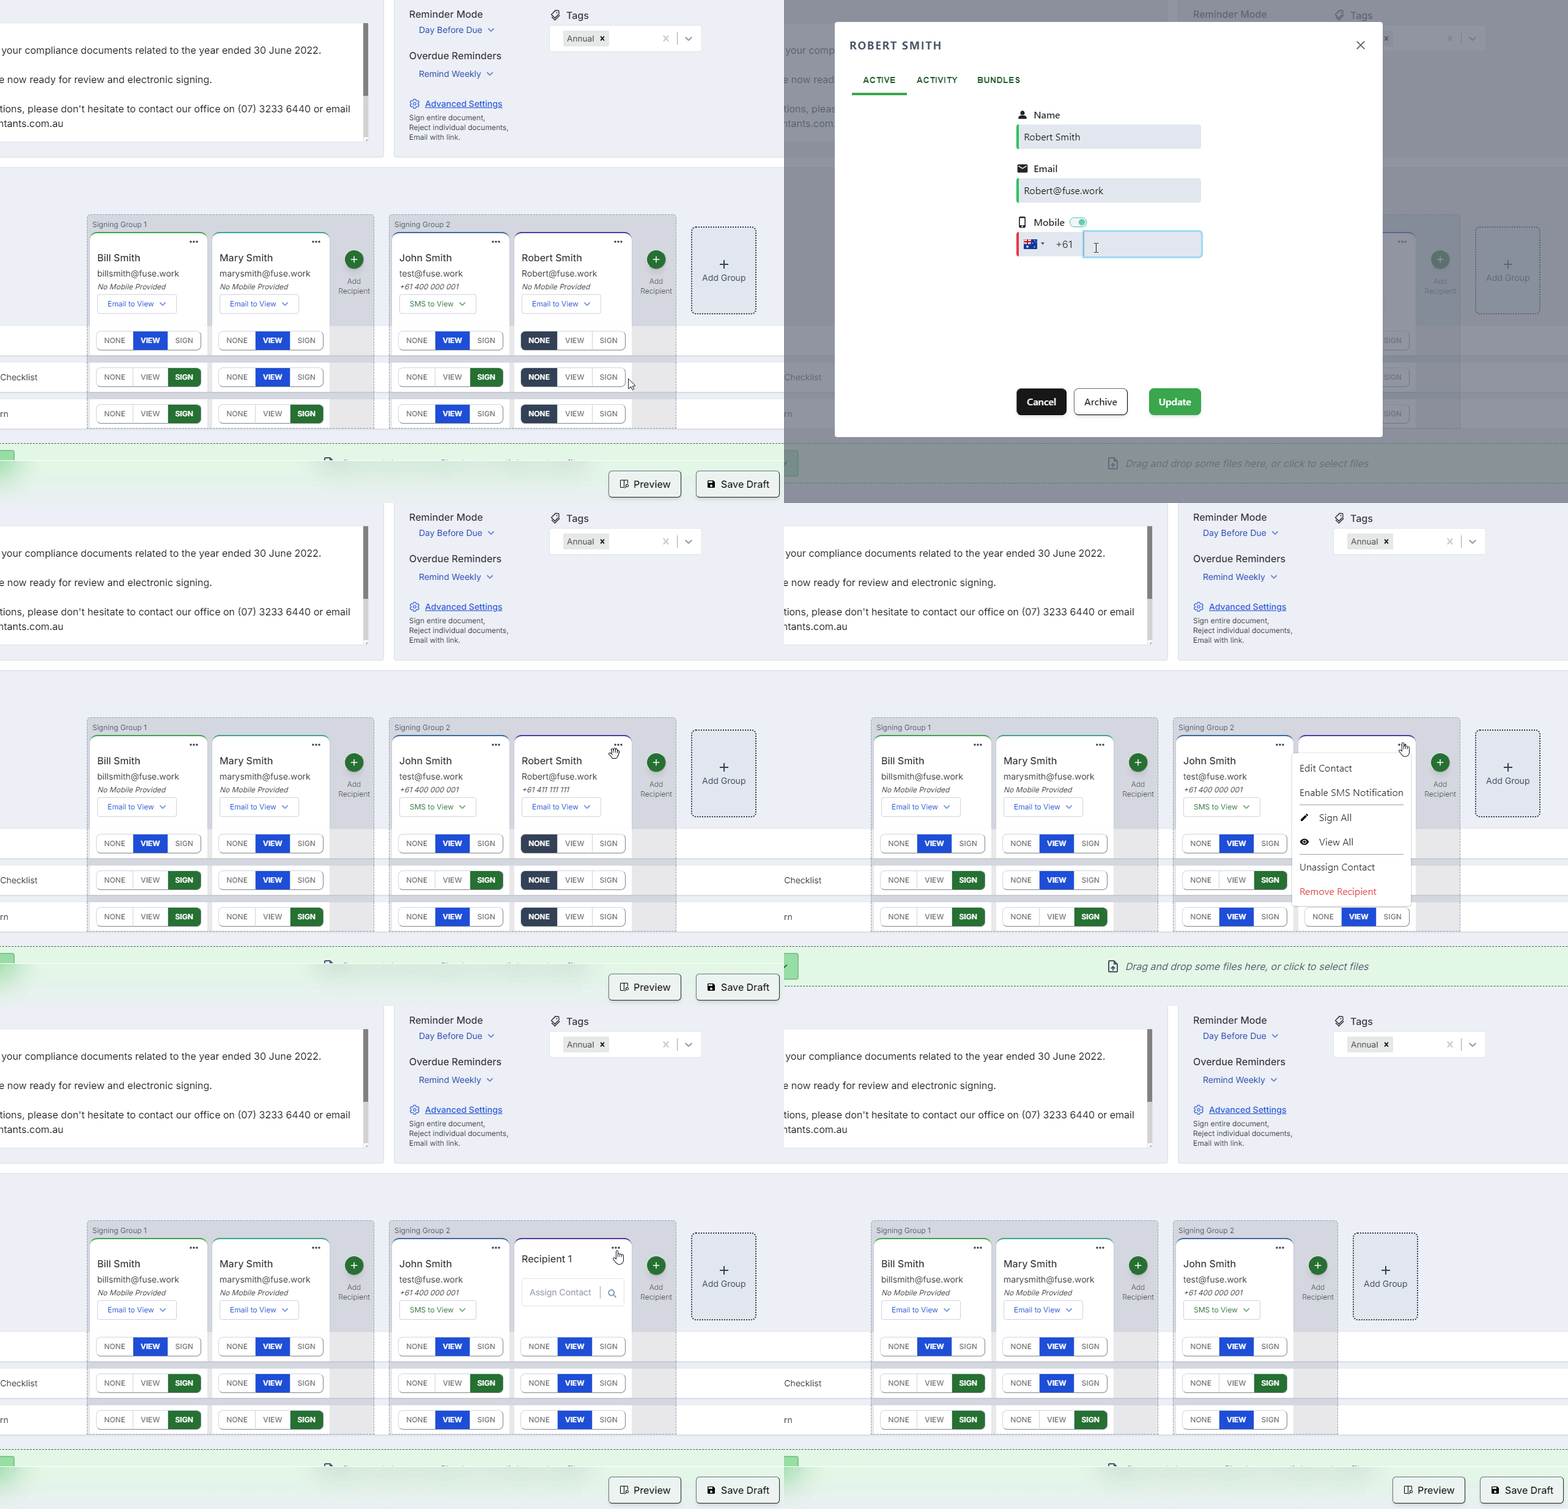
Use the  menu corresponding to the recipient to access additional settings and actions:
Edit Contact: This will allow you to edit and update the contact details for the
Enable SMS Notification: With this setting enabled, the recipient will recieve their bundle link via SMS as well as email. Please note that this is not 2FA. You can set SMS notifications to be enabled by default from the Settings.
 Sign All: Sets all of this recipients bundle actions to Sign
 View All: Sets all of this recipients bundle actions to View
Unassign Contact: Removes the assigned contact from the recipient place card, but will retain the recipient spot any any corresponding bundle actions or signature placeholders.
Remove Recipient: This will remove the recipient, including assigned contact and any placeholders, from the bundle.
Recipient Signing Order Groups
What is a Signing Order Group?
Recipient Signing Order Groups gives you granular control over the signing order of your bundle's recipients.
FuseSign will send the bundle to one group at a time, and will progress to the next group automatically and only when all signing actions from the preceding group are completed.
A common use case for recipient signing order is to add the Tax Agent as the last signer so that they will not receive the bundle to action until after the clients have signed their Income Tax Returns.
Groups can have as many or as few recipients as you choose, and there is no limit on the number of groups in a bundle. This means that you could have a new group for each signatory if you needed the bundle to progress one by one.
Adding Signing Order Groups
You can add a signing group by selecting the + Add Group button, or by dragging a recipient card to the grey area. You can also move recipients between groups by dragging and dropping. You can use the + Add Recipient button to add a recipient directing into an existing signing group.
In the example below Bill and Mary will need to complete their signing actions before the bundle is forwarded on to Bill (Jr). Once Bill (Jr) has completed their signing actions the bundle will be forwarded on to Partner 1.
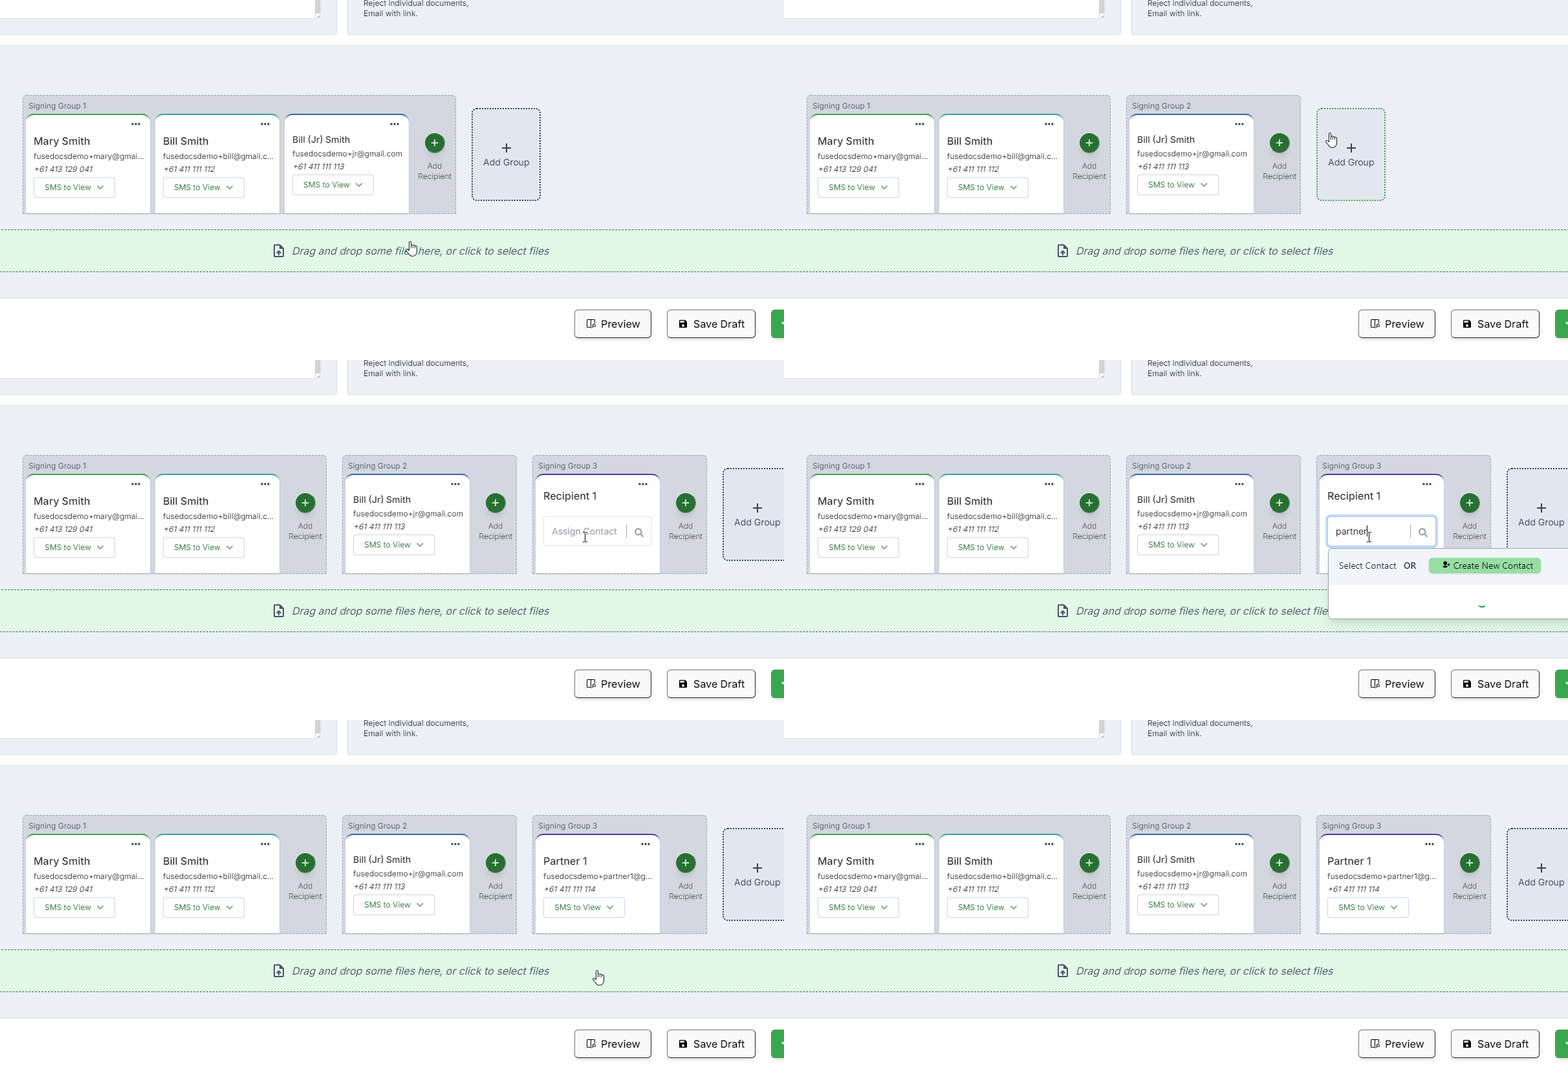
To delete a signing order group simply delete the recipients within it, or drag them to other groups.
Shared Recipient Details
You will receive an error if two recipients in the same bundle share an identical combination of email and phone number (or identical email only if SMS verification is not in use/no phone number is provided).
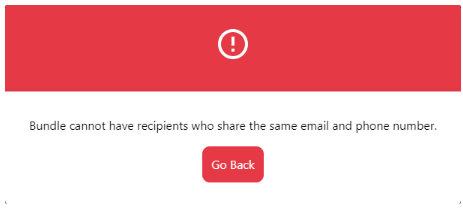

This is an intentional feature of the FuseSign platform. If claims are made against the validity of signatures, our audit trail must demonstrate that the signatory is a unique and identifiable person. As such, FuseSign requires recipients that share an email address in the same bundle to have different phone numbers to establish their identity as signers.
This means that:
In bundles where SMS verification is active, unique mobile numbers must be used for recipients who share an email address.
In bundles where SMS verification is switched off, email addresses must be unique.
We've designed FuseSign with professional services firms in mind, and we know that shared email addresses are a reality that can cause issues for electronic signatures. Our solution to overcome this is to incorporate SMS for multi-factor authentication, and having credits for that service included as part of the package. It is ultimately to the benefit of the recipients, and our clients, that these measures are in place, should the validity of their signatures ever come into question.
Note: Previously, it was possible to get around this requirement by adding a phone number to only one of the emails, or to add numbers to both recipients but not use SMS verification. This was an unintentional bug that has since been patched.
Overcoming Shared Recipient Details
There are three ways to approach situations where you have shared recipient details:
Obtain a different phone number for the second recipient - it is likely that two clients are not sharing the same mobile phone.
See if one of the recipients might be able to switch to a separate, non-shared email address. Email is typically free to set up and that may be an easier option.
Not recommended: You can send the documents via two separate bundles separately instead of one - one using SMS verification, and one without. This does not resolve the issue that the person without the mobile could still be impersonated by the other with access to the inbox - but it will allow you to send. The downside here is that shared documents won't be counter-signed - we cannot provide legal guidance around signing processes, but this is generally not considered to be a legal requirement.
Although we recommend your firm seek specific legal counsel regarding this, the view of many legal professionals in Australia is that bundles that share emails do not meet the requirement regarding establishing identity, and therefore allowing these documents to be sent as such could create a tenuous legal situation.
The fact is, this situation has never been tested in case law. The only thing that can be used is a reading of the Electronic Transactions Act specifically related to "a method is used to identify the person". When an email address is shared, there is no reasonable way to uniquely identify two or more individuals who have access to the same inbox.
We have heeded that advice from early in the product design of FuseSign, hence why we have hard coded this limitation. It's effectively to protect our clients from legal challenges against documents signed through our platform in the future as robustly as we can. It's our view as a firm that the lack of limitations in these circumstances would be a disservice to our clients.
Updating Active Bundle Recipient Details
It is possible to update the email or phone number of a recipient in an active bundle. Please see Editing Active Contacts.
You MUST NOT use these instructions to change a recipient to an entirely different person as this will affect the contact record for the recipient across all active bundles.
If you have any questions please contact our support team at support@fuse.work.
