Bundle Tags
Bundle Tags provide a way to categorise, sort, and report on your bundles based on attributes relevant to your business, such as Team, Partner, Document Type, and so on. Your business can have up to 256 different tag categories.
Buddle Tags are not visible to recipients, and are for internal use only in managing your bundles.
Creating Tags
Tags can be created by any user by typing the desired tag text into the Tags panel on the FuseSign draft bundle screen and pressing enter.
Editing Tags
Tags can be edited or removed through the Administrative Settings.
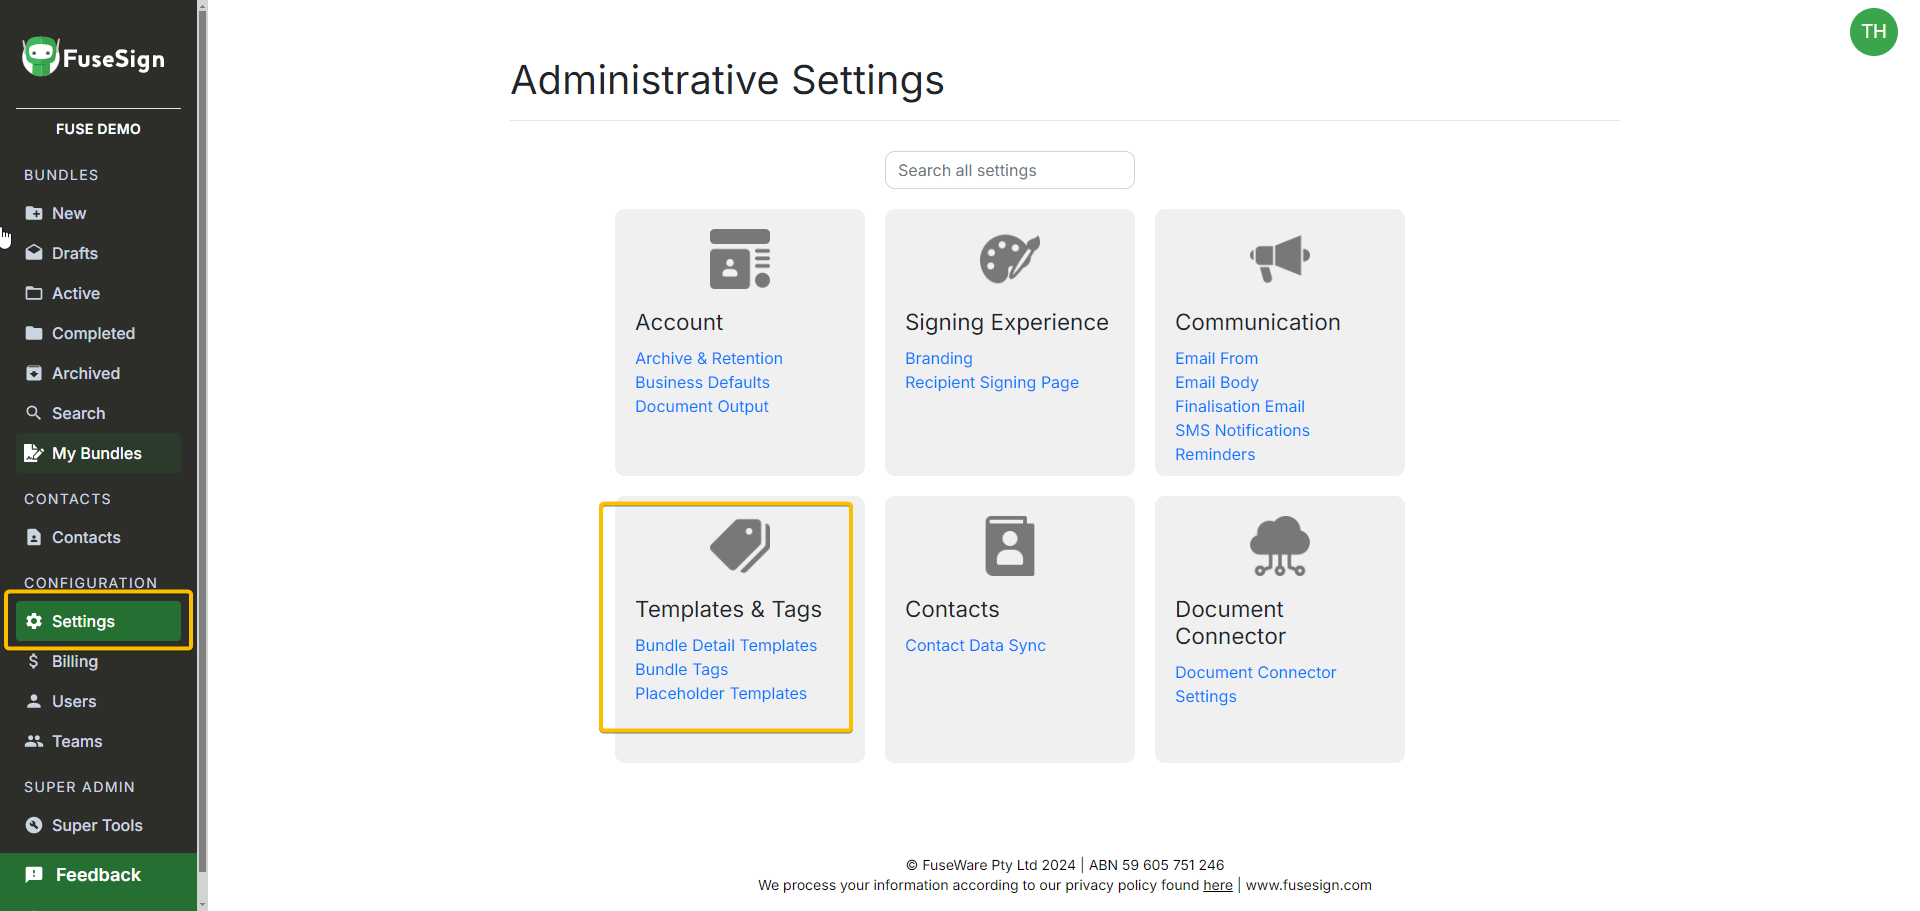
Step 1: Access the Administrative Settings by selecting Settings on the side navigation bar accessible from any screen in FuseSign.
Step 2: Select Bundle Tags in the Templates & Tags group of settings.

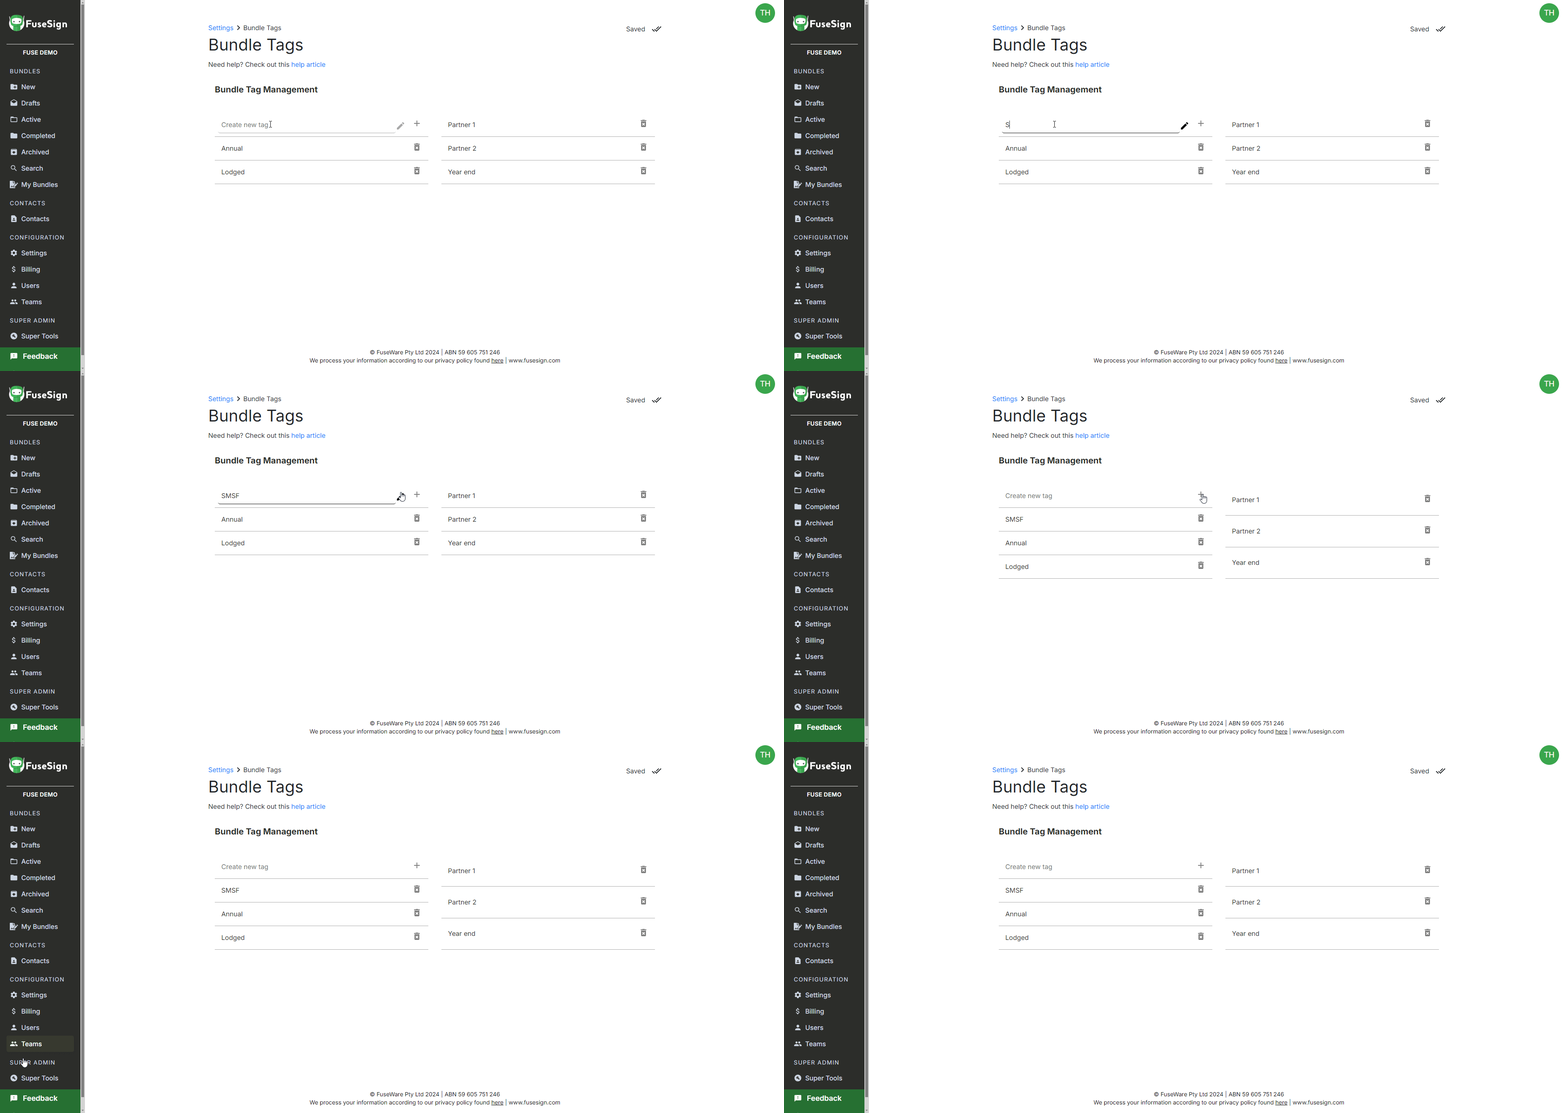
Step 3a: To create a new tag > type the tag label into the “Create new tag” box > press Enter. There is no limit on how many tags that you can setup.
Step 3b: To edit an existing tag > click the pencil icon > make your change > and click Save. Changing the tag will update the tag label on any bundles it is attached to.
Step 3c: To delete an existing tag, click the trash icon. Deleting the tag will remove the tag from any any bundles that it is attached to.

Assigning Tags to Bundles
Tags can be added to bundles before or after they are sent to the recipient for signing.
Adding Tags to New Bundles
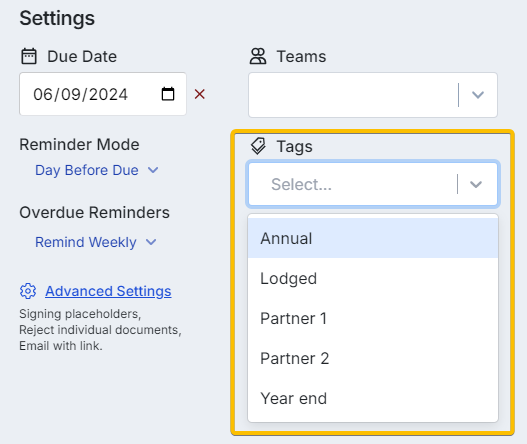
Step 1: In your draft bundle > go to the Details Panel > and find the Tags Section.
Step 2: Click the Add Tag button > use the drop down selection list to select the tag you require from the list of tags there were created in the section above. Click the selector again to add further tags.
Step 3: To remove a tag > click the x on the tag which has already been assigned to the bundle.

Adding Tags to Active Bundles
Tags can be added to bundles that have already been sent to recipients.
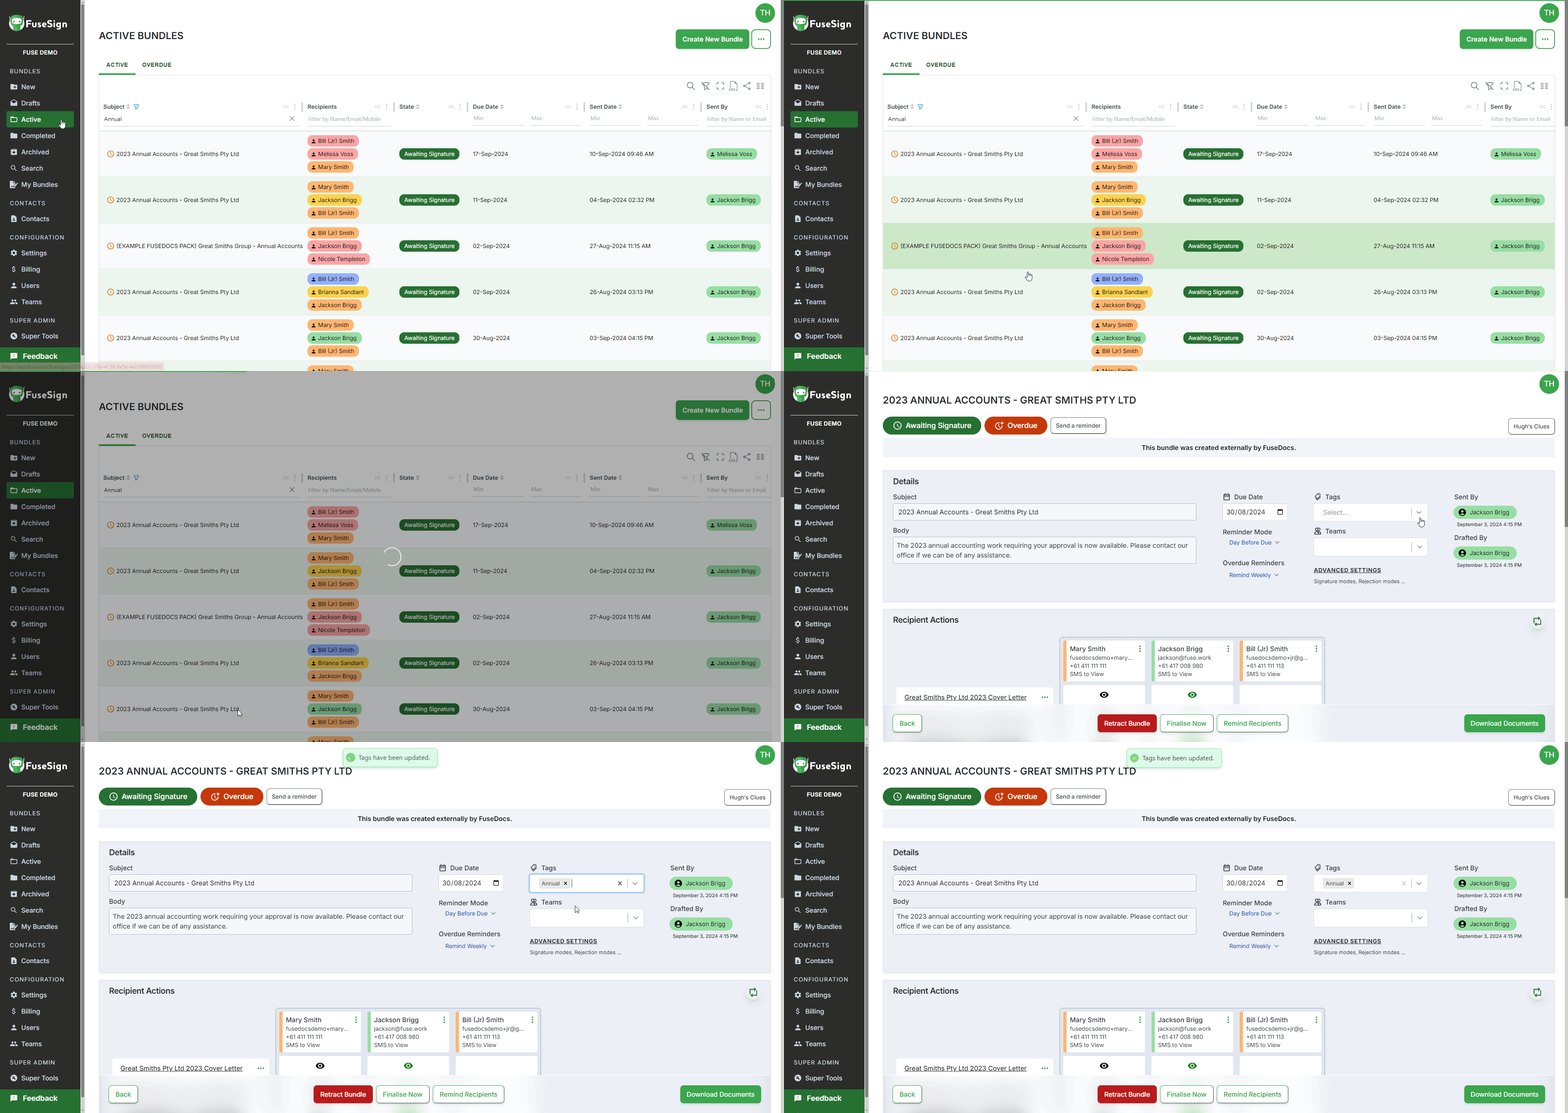
Step 1: Open the Active document bundle folder > select the bundle you require
Step 2: Click Add in the Tags section of the Bundle Details Panel > use the drop down selection list to select the tag you require from the list of tags there were created in the section above. Click the selector again to add further tags.
Step 3: To remove a tag > click the x on the tag which has already been assigned to the bundle.
Step 4: Your changes will automatically save when you leave the bundle. There is no need to click a save button.

Filtering on Tags
You can filter the view of any of your Document Bundle Folders see all bundles that have a specific tag, or combination of tags.
Step 1: Select the Document Bundle Folder you want to filter, or if you want to filter all bundles use the Search option under Document Bundles on the side navigation bar.
Step 2: If the Tags column isn’t available in you view > click the two column icon at the top right of the table > select Tags > click the tick icon to save the view.
Step 3: Click the magnifying glass icon in the Tags column > select the tag/s that are assigned to the bundle/s you need to see.
Step 4: If required, you can export a report of the filtered list of bundles following the instructions under Reporting.
If you have any questions, please contact our office at support@fuse.work.
